screen printed mugs
Screen Printing Mugs: A Beginner’s Guide.
Are you interested in learning how we create branded mugs using screen printing? If so, then this beginner’s guide to screen printing is just what you need! We’ll walk you through the process. From the supplies needed and the process of setting up the screens to printing mugs.
What is Screen Printing?
Screen printing is a popular printing technique used to transfer designs onto various materials such as fabric, paper and, of course, mugs. It involves using a mesh screen to transfer ink onto the desired material, creating a crisp and vibrant design.
Screen printing is ideal for cheap mug printing for promotional events. It is a versatile technique used to print designs in solid spot colours.
Benefits of Screen Printing.
Screen printing is a popular and cost effective printing technique. There are many benefits to choosing screen printing for mugs, including:
1. Durability: Screen printing with ceramic inks is durable. It can withstand repeated washing, and it will not scratch off. Ceramic ink is much more durable than other alternatives such as UV inks.
2. Versatility: We can print on a range of mug shapes, colours and materials with this process.
3. Quality: Screen printing produces high-quality mug printing that is vibrant, sharp, and long-lasting.
4. Cost-effective: Screen printing can be a very cost-effective printing option, especially for large orders. Cheap mug printers, for example, can produce high-quality printed mugs at a fraction of the cost of other printing methods.

Preparing Your Stencil for Screen Printing.
Once you’ve decided on the design you want to print, it must be prepared for screen printing. One thing to keep in mind is that screen printing is not always the best option for intricate or detailed designs, so it’s important to keep your design simple and bold.
Choose you mesh.
At this stage we choose the screen mesh that best suits your design. For mug printing a 77 mesh screen is usually used. Designs with big blocks of colour that need a thicker deposit, we would use a 53 mesh count. Finer detail requires a 120 mesh. We cannot use a mesh count greater than 120 as ceramic inks are too viscous to be able to go through such fine mesh. This is why very intricate designs are not possible using ceramic inks.
Apply a coat of emulsion to the screen mesh.
The emulsion is a photosensitive liquid that hardens when exposed to light. Once the emulsion is applied, it is left to dry in a dark, dry place. This usually takes around 2-4 hours.
Print Stencil Films.
For screen printing, each colour of your design is printed separately. Meaning a stencil for each colour is required. This is why, for screen printing, we need colour-separated eps files, allowing us to isolate each colour. We print each colour out as black onto a film ready for the stencil-making process.
Exposure Your Stencil.
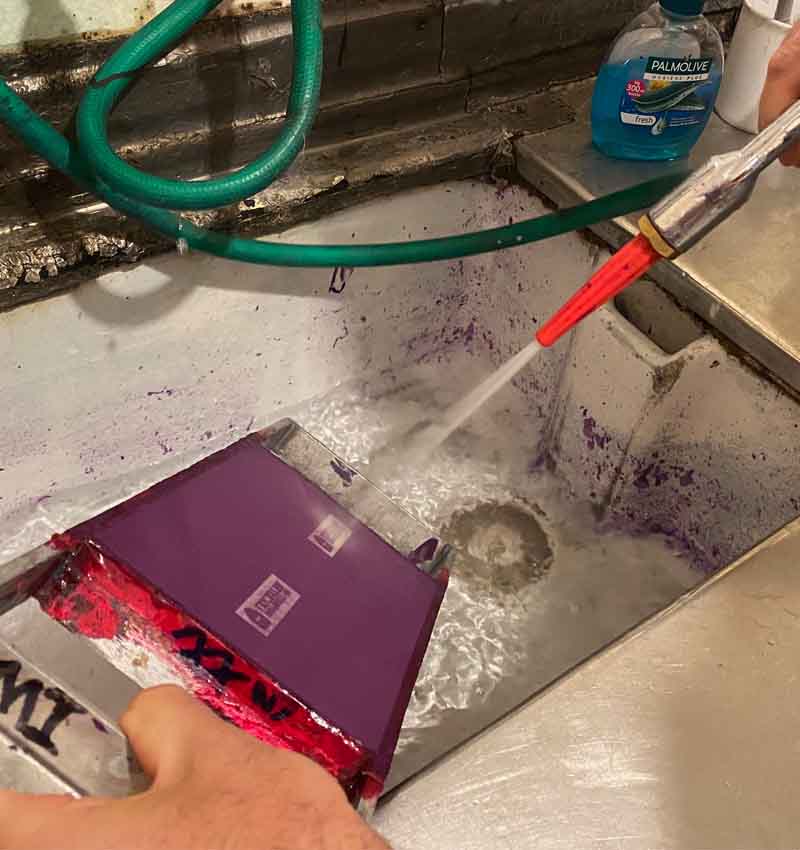
After the emulsion has dried, it’s time to expose the screen. We place your design on a clear transparency film and tape it onto the screen. We then use a light source to expose the screen, the time needed for exposure varies depending on the mesh used.
The areas where the light can’t penetrate will remain unexposed. Allowing you to wash away the emulsion and reveal your stencil. This will leave you with a clean and clear stencil that’s ready for printing.
Overall, preparing your design for screen printing can take some time and effort, but it’s well worth it for the final product. The stencil is key to high-quality mug printing.

Inking and Printing Your Design
When your screen is ready, it’s time to ink and print your design onto your desired mug.
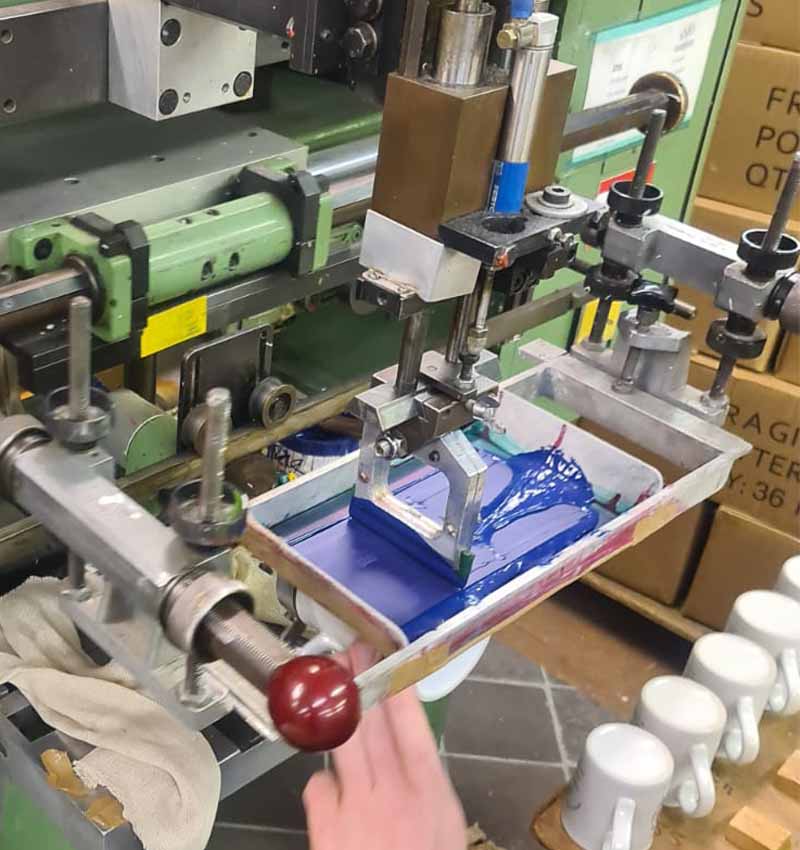
We fix the screen into position, and pour ink into the screen. The squeegee is pulled down into position, and the mug is rolls underneath the screen to print the design. It is important to get the right pressure for your squeegee. Too much and the ink will seep into areas where it is not wanted, too little, and the ink will not pass through the screen.
When the ink is dry it can be printed with another colour, or it is ready to go in the kiln for firing.
The Firing Process.
Once the mug printing process finishes, your promotional mugs are placed in a kiln. Where we fire them to 800 degrees centigrade and brought back to room temperature in a process that takes approximately 1 hour. The glaze of the mug melts and allows the ink into the glaze. The glaze hardens over the print when the mug is cooling, making printed mugs from Prince William Pottery dishwasher-safe and scratch resistant.

Why Use Prince William Pottery For Your Screen Printed Mugs?
Prince William Pottery is a specialist mug printer. We have been screen printing mugs for 50 years. With our vast experience and technical know-how, we have created processes that allow us to offer mugs at affordable prices.
Our cheap promotional mugs are of the highest quality and are 100% dishwasher safe. We offer our screen printing process on earthenware, bone china and our budget mug range, for customers with limited budgets.
So whether you want cheap promotional mugs for a brand awareness campaign or gifts for loyal customers, our mugs are the perfect way to get your name out there.
So why wait? Browse our selection of printed mugs today and start spreading your message in style with one of our branded mugs. And remember, our team is always here to help if you need any help in finding the perfect mug for your needs.